
 个人中心
个人中心 退出
退出


js实现上传头像(看了你就懂,相信我)
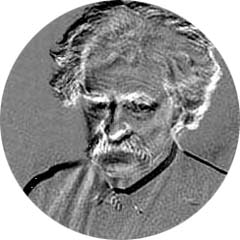
效果图:

html:
<div class="tx ovf">
<div class="tit">头像</div>
<div class="ovf tx-img"><img src="" alt="">
<div class="upload-b"><span>修改头像</span><input type="file" class="upload1"></div>
</div>
</div>
css:
.ovf{overflow: hidden;}
.tit { float: left; width: 50px; margin-top: 39px; font-size: 0.9vw; color: #999999; }
.tx{ margin-top:44px; }
.tx img{ width: 90px; height: 90px; border-radius:50%; margin-right:30px;border: 1px solid #fca89d; }
.tx span{ border: solid 1px #fca89d; color: #fca89d; font-size: 16px; padding: 10px; cursor: pointer; }
.upload1 { position: absolute; right:0; }
.tx img{ float: left; }
.tx input{ width: 86%; opacity: 0; }
.upload-b { float: left; margin-top:36px; position: relative; }
js:
$(".upload1").change(function(){
var file=this.files[0];
readFile(file);
});
function readFile(file) {
// 新建阅读器
var reader = new FileReader();
// 根据文件类型选择阅读方式
switch (file.type){
case 'image/jpg':
case 'image/png':
case 'image/jpeg':
case 'image/gif':
reader.readAsDataURL(file);
break;
}
// 当文件阅读结束后执行的方法
reader.addEventListener('load',function () {
// 如果说让读取的文件显示的话 还是需要通过文件的类型创建不同的标签
switch (file.type){
case 'image/jpg':
case 'image/png':
case 'image/jpeg':
case 'image/gif':
console.log(reader.result);
$(".tx-img img").attr("src",reader.result);
break;
}
});
}
作者:Vam的金豆之路
主要领域:前端开发
我的微信:maomin9761
微信公众号:前端历劫之路
 分类导航
分类导航