seata部署并设置开机自启
seata部署文档
上传压缩包
上传压缩包 seata-server-1.4.0.tar.gz 到linux服务器 /opt 下
解压
解压 seata-server-1.4.0.tar.gz
tar -zxvf seata-server-1.4.0.tar.gz
解压后的目录是 seata
seata的配置文件修改
修改 /opt/seata/conf 下的 file.conf 和 registry.conf
file.conf
## transaction log store, only used in seata-server
store {
## store mode: file、db、redis
mode = "db"
## database store property
db {
## the implement of javax.sql.DataSource, such as DruidDataSource(druid)/BasicDataSource(dbcp)/HikariDataSource(hikari) etc.
datasource = "druid"
## mysql/oracle/postgresql/h2/oceanbase etc.
dbType = "mysql"
driverClassName = "com.mysql.jdbc.Driver"
url = "jdbc:mysql://10.100.232.173:3306/seata"
user = "root"
password = "123456"
minConn = 5
maxConn = 100
globalTable = "global_table"
branchTable = "branch_table"
lockTable = "lock_table"
queryLimit = 100
maxWait = 5000
}
}
registry.conf
registry {
# file 、nacos 、eureka、redis、zk、consul、etcd3、sofa
type = "nacos"
loadBalance = "RandomLoadBalance"
loadBalanceVirtualNodes = 10
nacos {
application = "seata-server"
serverAddr = "10.100.232.172:8848"
group = "SEATA_GROUP"
namespace = ""
cluster = "default"
username = "nacos"
password = "nacos"
}
}
创建seata的数据库
在mysql上创建一个 mscm-seata-test 的数据库(你可以根据自己的喜好取名字),执行如下脚本,把表同步进去
-- -------------------------------- The script used when storeMode is 'db' --------------------------------
-- the table to store GlobalSession data
CREATE TABLE IF NOT EXISTS `global_table`
(
`xid` VARCHAR(128) NOT NULL,
`transaction_id` BIGINT,
`status` TINYINT NOT NULL,
`application_id` VARCHAR(32),
`transaction_service_group` VARCHAR(32),
`transaction_name` VARCHAR(128),
`timeout` INT,
`begin_time` BIGINT,
`application_data` VARCHAR(2000),
`gmt_create` DATETIME,
`gmt_modified` DATETIME,
PRIMARY KEY (`xid`),
KEY `idx_gmt_modified_status` (`gmt_modified`, `status`),
KEY `idx_transaction_id` (`transaction_id`)
) ENGINE = InnoDB
DEFAULT CHARSET = utf8;
-- the table to store BranchSession data
CREATE TABLE IF NOT EXISTS `branch_table`
(
`branch_id` BIGINT NOT NULL,
`xid` VARCHAR(128) NOT NULL,
`transaction_id` BIGINT,
`resource_group_id` VARCHAR(32),
`resource_id` VARCHAR(256),
`branch_type` VARCHAR(8),
`status` TINYINT,
`client_id` VARCHAR(64),
`application_data` VARCHAR(2000),
`gmt_create` DATETIME(6),
`gmt_modified` DATETIME(6),
PRIMARY KEY (`branch_id`),
KEY `idx_xid` (`xid`)
) ENGINE = InnoDB
DEFAULT CHARSET = utf8;
-- the table to store lock data
CREATE TABLE IF NOT EXISTS `lock_table`
(
`row_key` VARCHAR(128) NOT NULL,
`xid` VARCHAR(96),
`transaction_id` BIGINT,
`branch_id` BIGINT NOT NULL,
`resource_id` VARCHAR(256),
`table_name` VARCHAR(32),
`pk` VARCHAR(36),
`gmt_create` DATETIME,
`gmt_modified` DATETIME,
PRIMARY KEY (`row_key`),
KEY `idx_branch_id` (`branch_id`)
) ENGINE = InnoDB
DEFAULT CHARSET = utf8;
seata配置信息数据上传到nacos
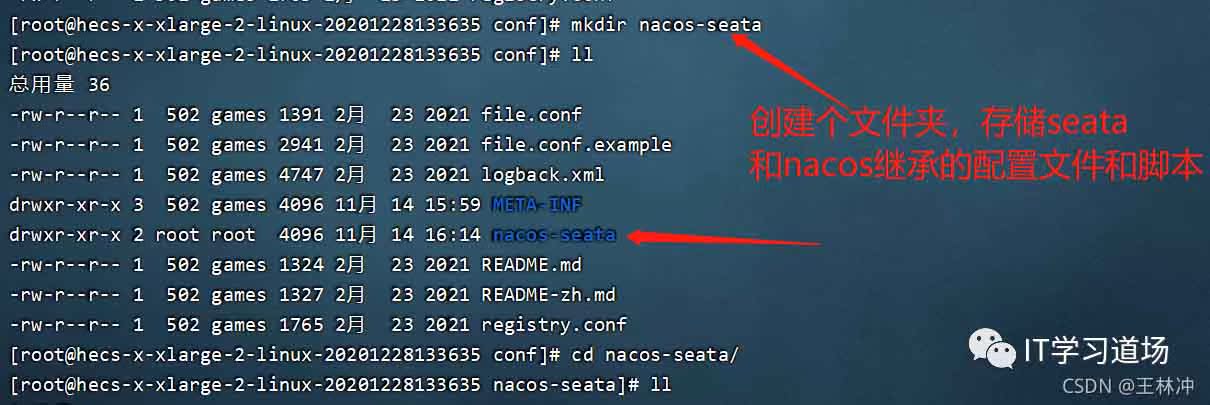
创建nacos-seata文件夹,存储nacos的脚本和配置
创建 nacos-config.sh,和 nacos-config.txt
我的在一个目录下的,一会儿改下nacos-config.sh的扫描nacos-config.txt路径就行
nacos-config.txt内容
#我的只是mysql的DB模式,就需要这些,你若是用其他的,可以保留其他配置
service.vgroupMapping.my_test_tx_group=default
service.default.grouplist=127.0.0.1:8091
service.enableDegrade=false
service.disableGlobalTransaction=false
store.mode=db
store.db.datasource=druid
store.db.dbType=mysql
store.db.driverClassName=com.mysql.jdbc.Driver
store.db.url=jdbc:mysql://10.100.232.173:3306/seata?useUnicode=true
store.db.user=root
store.db.password=123456
store.db.minConn=5
store.db.maxConn=30
store.db.globalTable=global_table
store.db.branchTable=branch_table
store.db.queryLimit=100
store.db.lockTable=lock_table
store.db.maxWait=5000
nacos-config.sh内容:
#!/usr/bin/env bash
# Copyright 1999-2019 Seata.io Group.
#
# Licensed under the Apache License, Version 2.0 (the "License");
# you may not use this file except in compliance with the License.
# You may obtain a copy of the License at、
#
# http://www.apache.org/licenses/LICENSE-2.0
#
# Unless required by applicable law or agreed to in writing, software
# distributed under the License is distributed on an "AS IS" BASIS,
# WITHOUT WARRANTIES OR CONDITIONS OF ANY KIND, either express or implied.
# See the License for the specific language governing permissions and
# limitations under the License.
while getopts ":h:p:g:t:u:w:" opt
do
case $opt in
h)
host=$OPTARG
;;
p)
port=$OPTARG
;;
g)
group=$OPTARG
;;
t)
tenant=$OPTARG
;;
u)
username=$OPTARG
;;
w)
password=$OPTARG
;;
?)
echo " USAGE OPTION: $0 [-h host] [-p port] [-g group] [-t tenant] [-u username] [-w password] "
exit 1
;;
esac
done
if [[ -z ${host} ]]; then
host=localhost
fi
if [[ -z ${port} ]]; then
port=8848
fi
if [[ -z ${group} ]]; then
group="SEATA_GROUP"
fi
if [[ -z ${tenant} ]]; then
tenant=""
fi
if [[ -z ${username} ]]; then
username=""
fi
if [[ -z ${password} ]]; then
password=""
fi
nacosAddr=$host:$port
contentType="content-type:application/json;charset=UTF-8"
echo "set nacosAddr=$nacosAddr"
echo "set group=$group"
failCount=0
tempLog=$(mktemp -u)
function addConfig() {
curl -X POST -H "${contentType}" "http://$nacosAddr/nacos/v1/cs/configs?dataId=$1&group=$group&content=$2&tenant=$tenant&username=$username&password=$password" >"${tempLog}" 2>/dev/null
if [[ -z $(cat "${tempLog}") ]]; then
echo " Please check the cluster status. "
exit 1
fi
if [[ $(cat "${tempLog}") =~ "true" ]]; then
echo "Set $1=$2 successfully "
else
echo "Set $1=$2 failure "
(( failCount++ ))
fi
}
count=0
# 刚刚$(dirname "$PWD")/nacos-seata/nacos-config.txt所在的路径,你的不一样,可以自己修改
for line in $(cat $(dirname "$PWD")/nacos-seata/nacos-config.txt | sed s/[[:space:]]//g); do
(( count++ ))
key=${line%%=*}
value=${line#*=}
addConfig "${key}" "${value}"
done
echo "========================================================================="
echo " Complete initialization parameters, total-count:$count , failure-count:$failCount "
echo "========================================================================="
if [[ ${failCount} -eq 0 ]]; then
echo " Init nacos config finished, please start seata-server. "
else
echo " init nacos config fail. "
fi
然后给nacos-config.sh执行权限即可,再执行如下命令:
sh nacos-config.sh
看下nacos
管理脚本
切换到/opt/seata的目录下,创建 seata-start.sh 和 seata-stop.sh 和 kill-process.sh
seata-start.sh 内容
nohup ./bin/seata-server.sh -p 8091 > ./logs/seata.log 2>&1 &
kill-process.sh 内容
#!/bin/sh
#根据进程名杀死进程
if [ $# -lt 1 ]
then
echo "缺少参数:procedure_name"
exit 1
fi
PROCESS=`ps -ef|grep $1|grep -v grep|grep -v PPID|awk '{ print $2}'`
for i in $PROCESS
do
echo "Kill the $1 process [ $i ]"
kill -9 $i
done
kill-process.sh 内容
./kill-process.sh seata
seata-stop.sh 内容
#杀死进程名字 = seata 的进程
./kill-process.sh seata
再创建一个seata-restart.sh的脚本,处理seata的重启,里面就是调用 seata-stop.sh,再调用 seata-start.sh而已;
seata-restart.sh:
#执行停止脚本
./seata-stop.sh
echo "seata正在启动......"
#执行启动脚本
./seata-start.sh
# $?代表上个命令执行状态,如果 = 0,则说明执行成功
if [ $? -eq 0 ];then
sleep 5s
echo "seata启动成功......"
else
echo "seata启动失败......"
fi
分别给这几个sh脚本执行权限,就可以直接执行对应脚本,来启动,停止,重启seata了
seata开机自启
上面的脚本是手动执行,开机不能自启 ,每次宕机,都要手动重启seata,太麻烦
给seata设置开机自启
1)cd /etc/init.d 进入目录
2)创建文件seata
#!/bin/bash
#
#chkconfig: 345 63 37
#description: seata
#processname: seata
export JAVA_HOME=/opt/jdk8/jdk1.8.0_333
export CLASSPATH=.:$JAVA_HOME/lib/dt.jar:$JAVA_HOME/lib/tools.jar
export PATH=$PWD/bin:$JAVA_HOME/bin:$PATH
SEATA_HOME=/opt/seata
case $1 in
start)
nohup sh $SEATA_HOME/bin/seata-server.sh -p 8091 -h 10.100.232.171 > seata.out 2>&1 &
echo $! > $SEATA_HOME/bin/seata.pid
echo "seata is started"
;;
stop)
pid=`ps -ef|grep seata |grep -v grep|grep -v PPID|awk '{ print $2}'`
kill -9 $pid
echo "seata is stopped"
;;
*)
echo "start|stop|restart"
;;
esac
exit 0
3)给脚本添加权限chmod 755 seata
4)添加服务到开机项 chkconfig --add seata
5)设置为开机启动 chkconfig seata on
6)测试 service seata start
作者:IT学习道场
欢迎关注微信公众号 : IT学习道场


 个人中心
个人中心 退出
退出


 分类导航
分类导航